1. My Time Menu
1.1 Dashboard
The My Time menu provides employees with
access to their personal time-related
information and activities. It serves
as a centralized area where users can
view and manage records associated with
working time, leave requests, allocations,
and attendance-related activities.
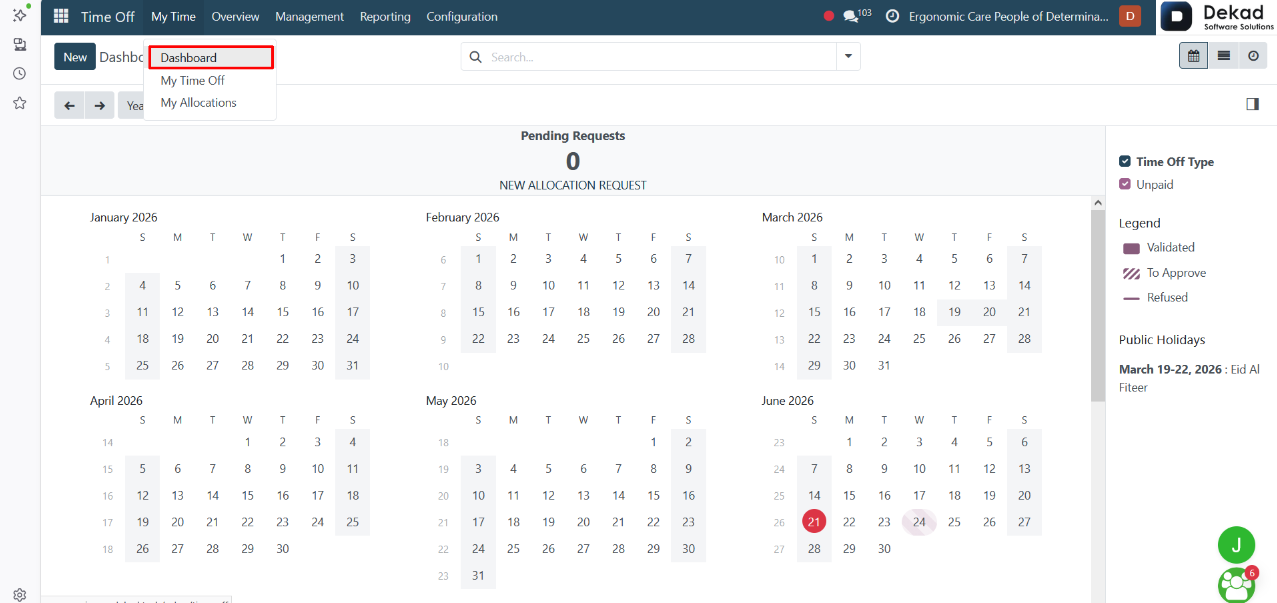
Through this menu, users can:
• Monitor their current status.
• Review previous records and requests.
• Submit and track time-related requests.
• Follow the progress of pending approvals.
• Access information related to leave balances and attendance activities.
The information displayed in this section
helps employees effectively manage their
time records, stay informed about ongoing
requests, and maintain visibility over
their available balances and activities.
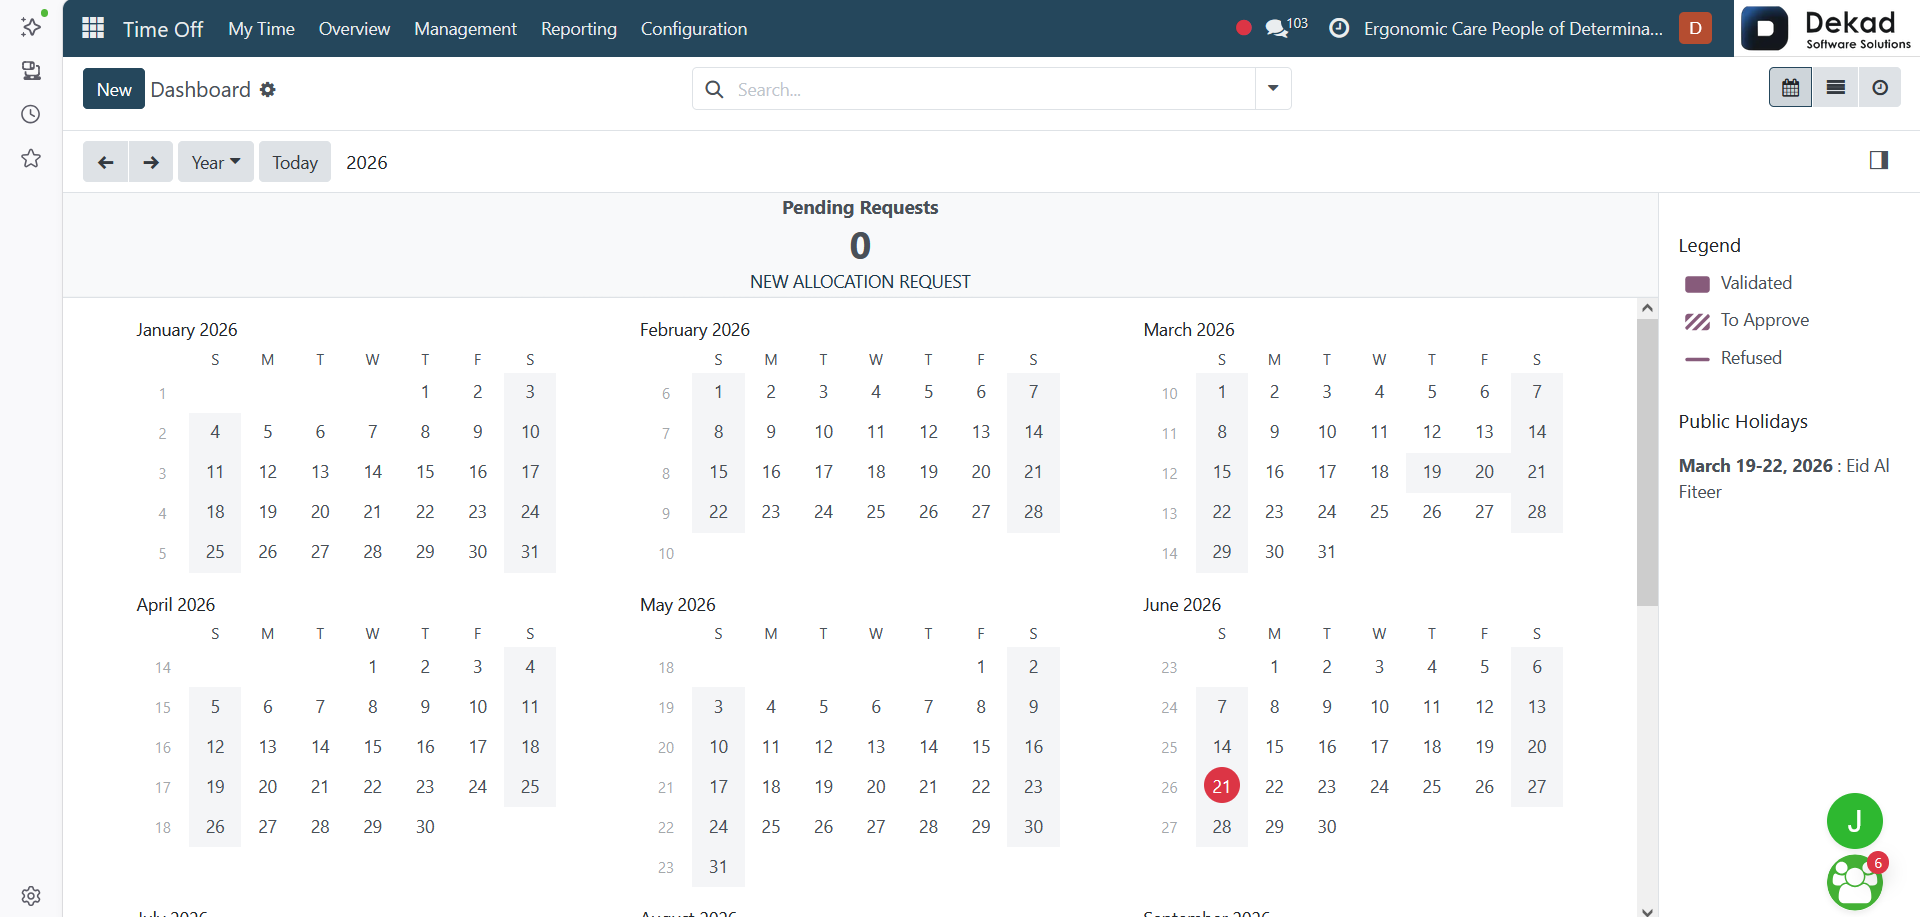
Calendar View Options
The calendar view options allow users
to customize how information is displayed,
making it easier to review records over
different periods of time.
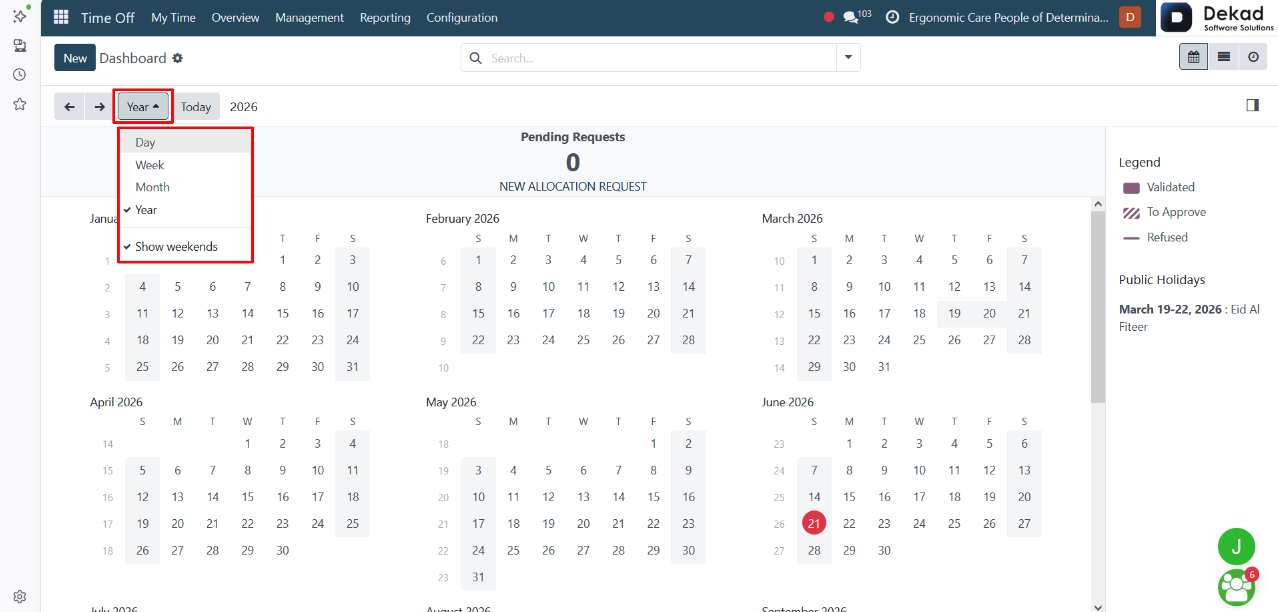
Users can switch between Day, Week, Month,
and Year views depending on the level of
detail they need. A shorter period provides
a more detailed view of activities, while
a longer period offers a broader overview.
The Year selector allows users to navigate
between different years and review records
from past or future periods.
The Show Weekends option enables users to
include weekend days in the calendar view,
providing a complete overview of all
dates within the selected period.
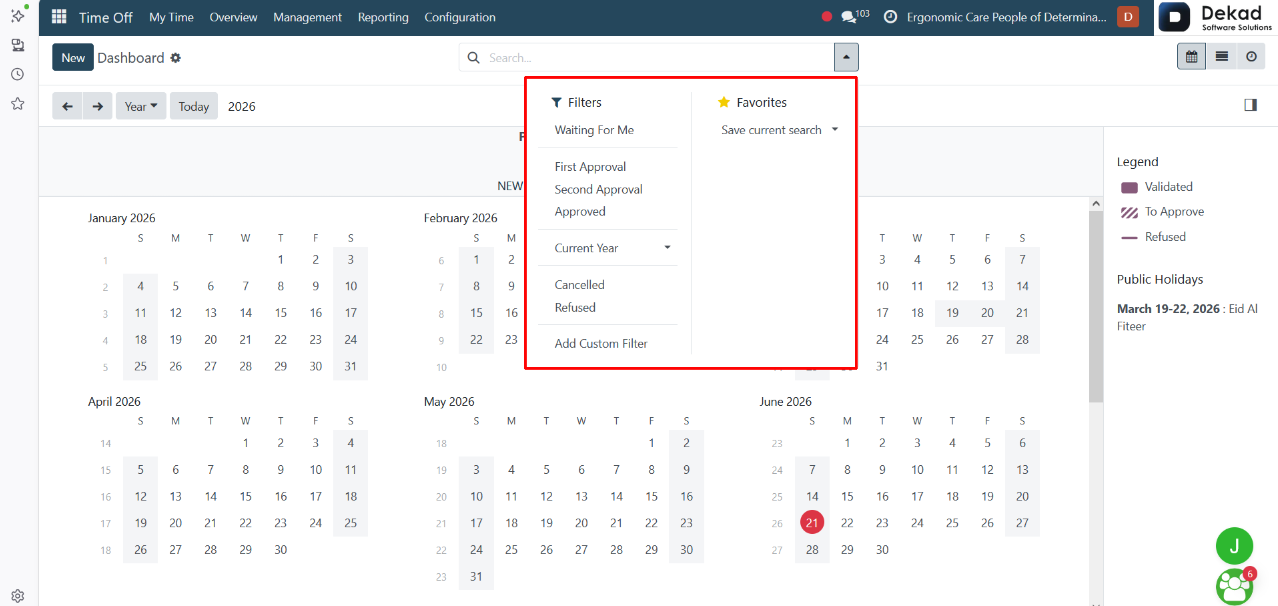
Search and Filtering
The search and filtering options help
users quickly locate specific records
and display only the information
relevant to their needs.
Users can search for records using keywords
and apply filters to narrow down the displayed
results based on selected criteria. This
makes it easier to find information, organize
records, and focus on specific data without
manually reviewing all available entries.
Filtering options can be used individually
or combined to create more precise search results.
Legend
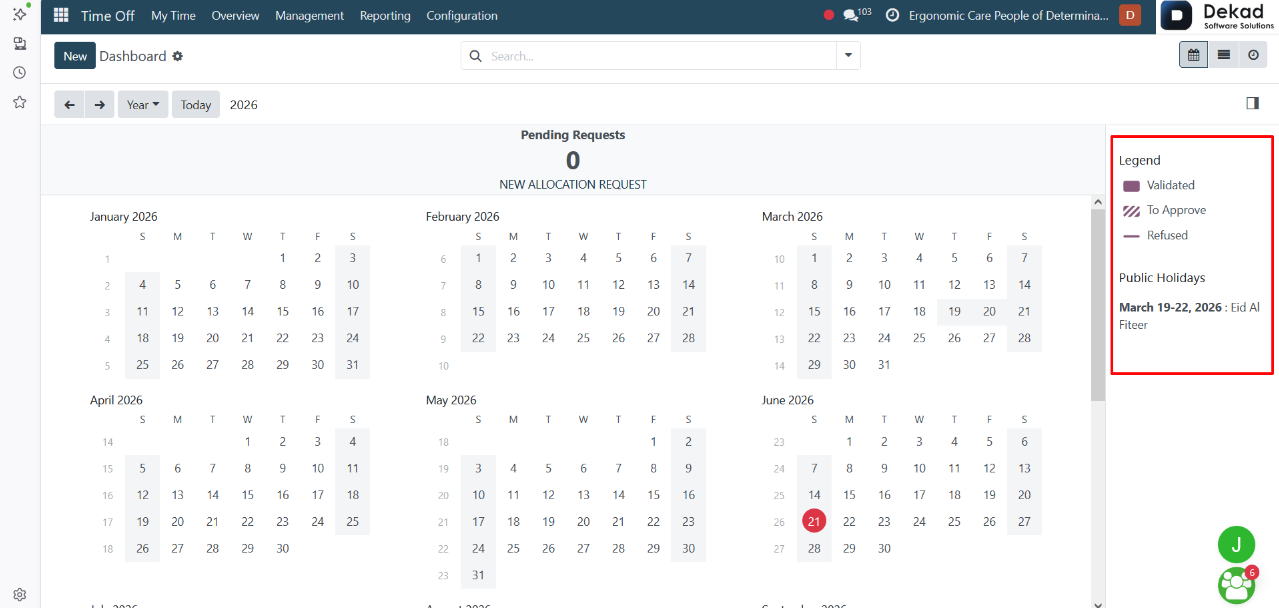
The legend is used to explain the meaning of
different colors or labels that appear
in the calendar.
Validated → request is approved and accepted.
To Approve → request is still waiting for approval.
Refused → request is rejected and not accepted.
Public Holidays
Public holidays show the official non-working days in the calendar.
New Button
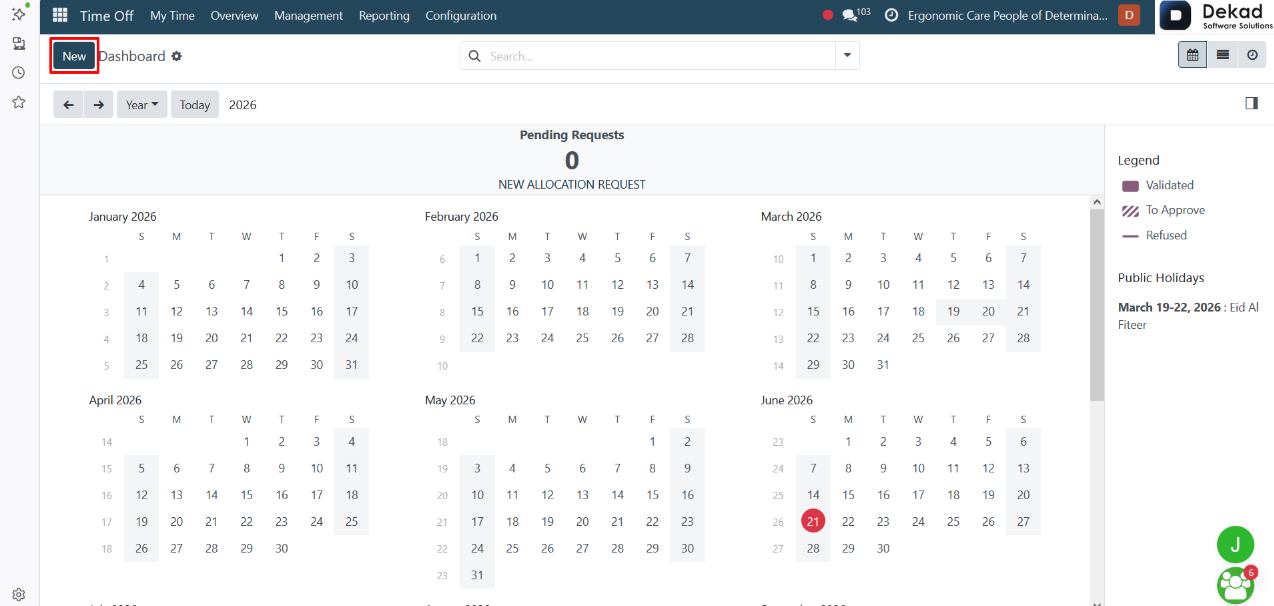
The New button is used to create
a new request within the system.
When users click on it, a form opens where
they can enter the required information
such as dates and request details, then
submit it for processing.
This button is mainly used to quickly add
new records without navigating through
multiple menus, making the process faster
and easier for users.
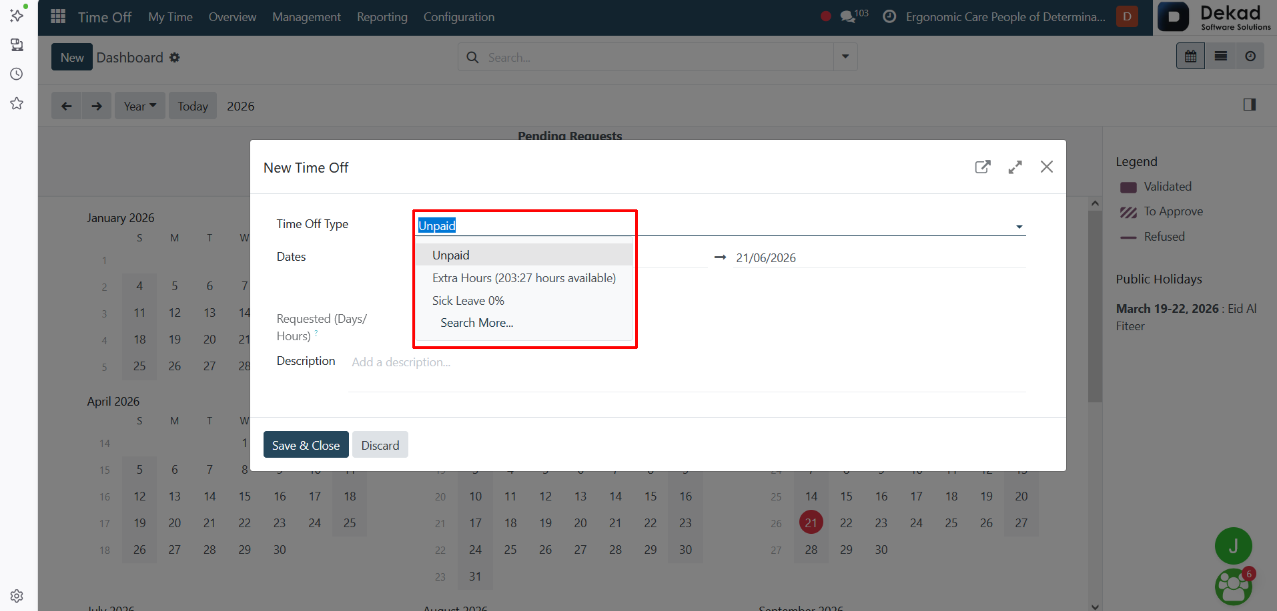
New Time Off Request Form
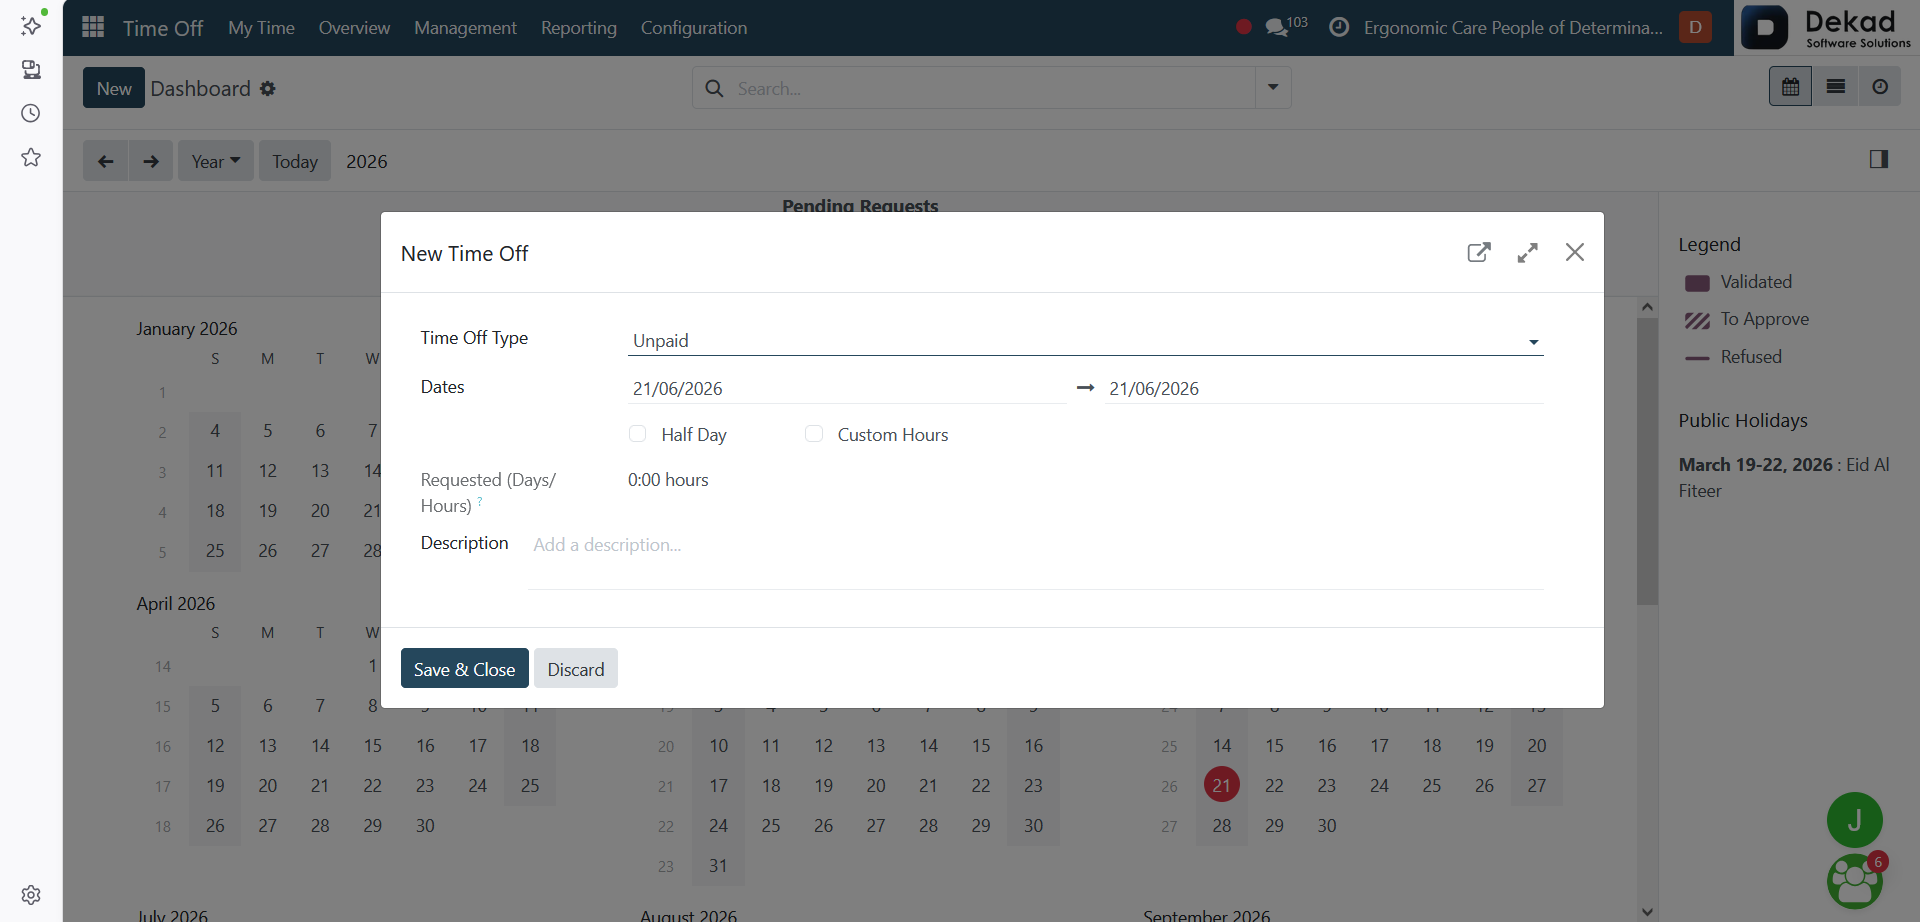
When creating a new time off request, the system
opens a form where the user enters the details of
their absence.
The form includes the following fields:
Time Off Type
The category of leave the user wants to
take (e.g., extra hours, sick leave).
It defines the purpose of the request.
Dates
The start and end dates of the
requested time off period.
Half Day
Used when the user wants to take only
part of a day instead of a full day.
Custom Hours
Allows the user to specify exact working
hours instead of full or half days.
Requested (Days/Hours)
Automatically calculates the total duration
of the requested time off based on the
selected dates and type.
Description
A text field where the user can add
extra details or notes about the request.
Actions
Save & Close
Saves the request and submits it for processing.
Discard
Cancels the request and closes the form without saving any data.
Time Off Types
The Time Off Types define the different
categories of leave an employee can request.
Unpaid Leave
Time off where the employee is absent without
receiving payment. It is usually used when
paid leave is not available or when additional
leave is required.
Extra Hours
Represents additional working time or compensatory
time. It tracks overtime balance that can be
used later as time off instead of payment.
Example: 203:27 hours available means the employee has
accumulated 203 hours and 27 minutes of extra work time.
Sick Leave
Time off taken due to health-related reasons.
In some cases, it may be fully or partially
paid depending on the policy.
The 0% indicates that no paid entitlement or balance
is currently available for this type.
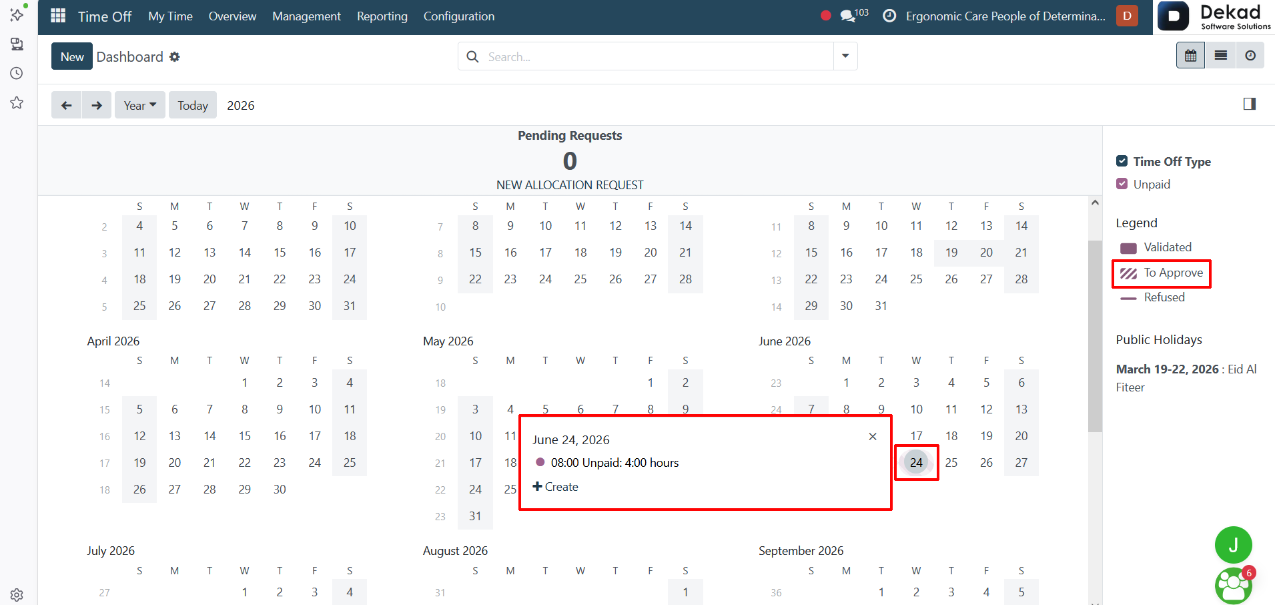
Time Off Request Status (Calendar View)
After submitting a time off request and
clicking Save & Close, the request
immediately appears in the calendar view.
A colored marker is displayed on the selected
day(s), indicating that a request has been
created for that period.
When the user clicks on the marked day,
a pop-up opens showing the full details
of the request, including the type of
leave, dates, and duration.
At this stage, the request status is shown
as To Approve, meaning it has been successfully
submitted but is still waiting for approval.
Once submitted, the request becomes visible
in the calendar for users who have access,
such as the administrator and any user
with permission to view the calendar.
This allows them to track pending absences
and manage scheduling accordingly.
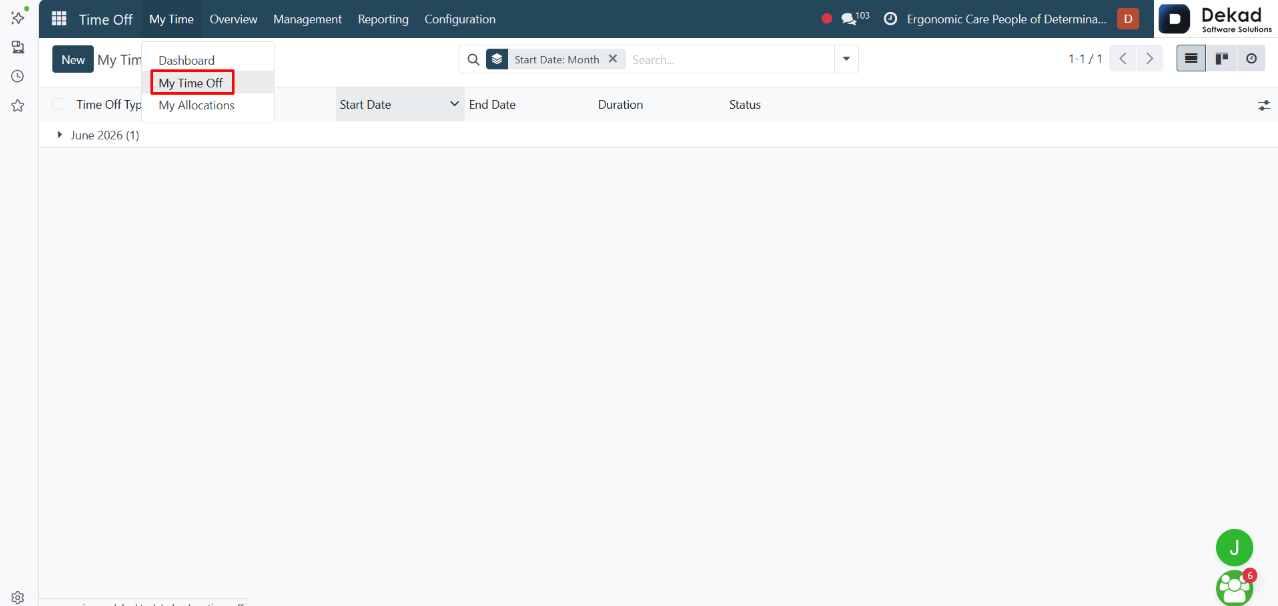
1.2 My Time Off
The My Time Off section allows users
to view and manage their personal leave
records in one place.
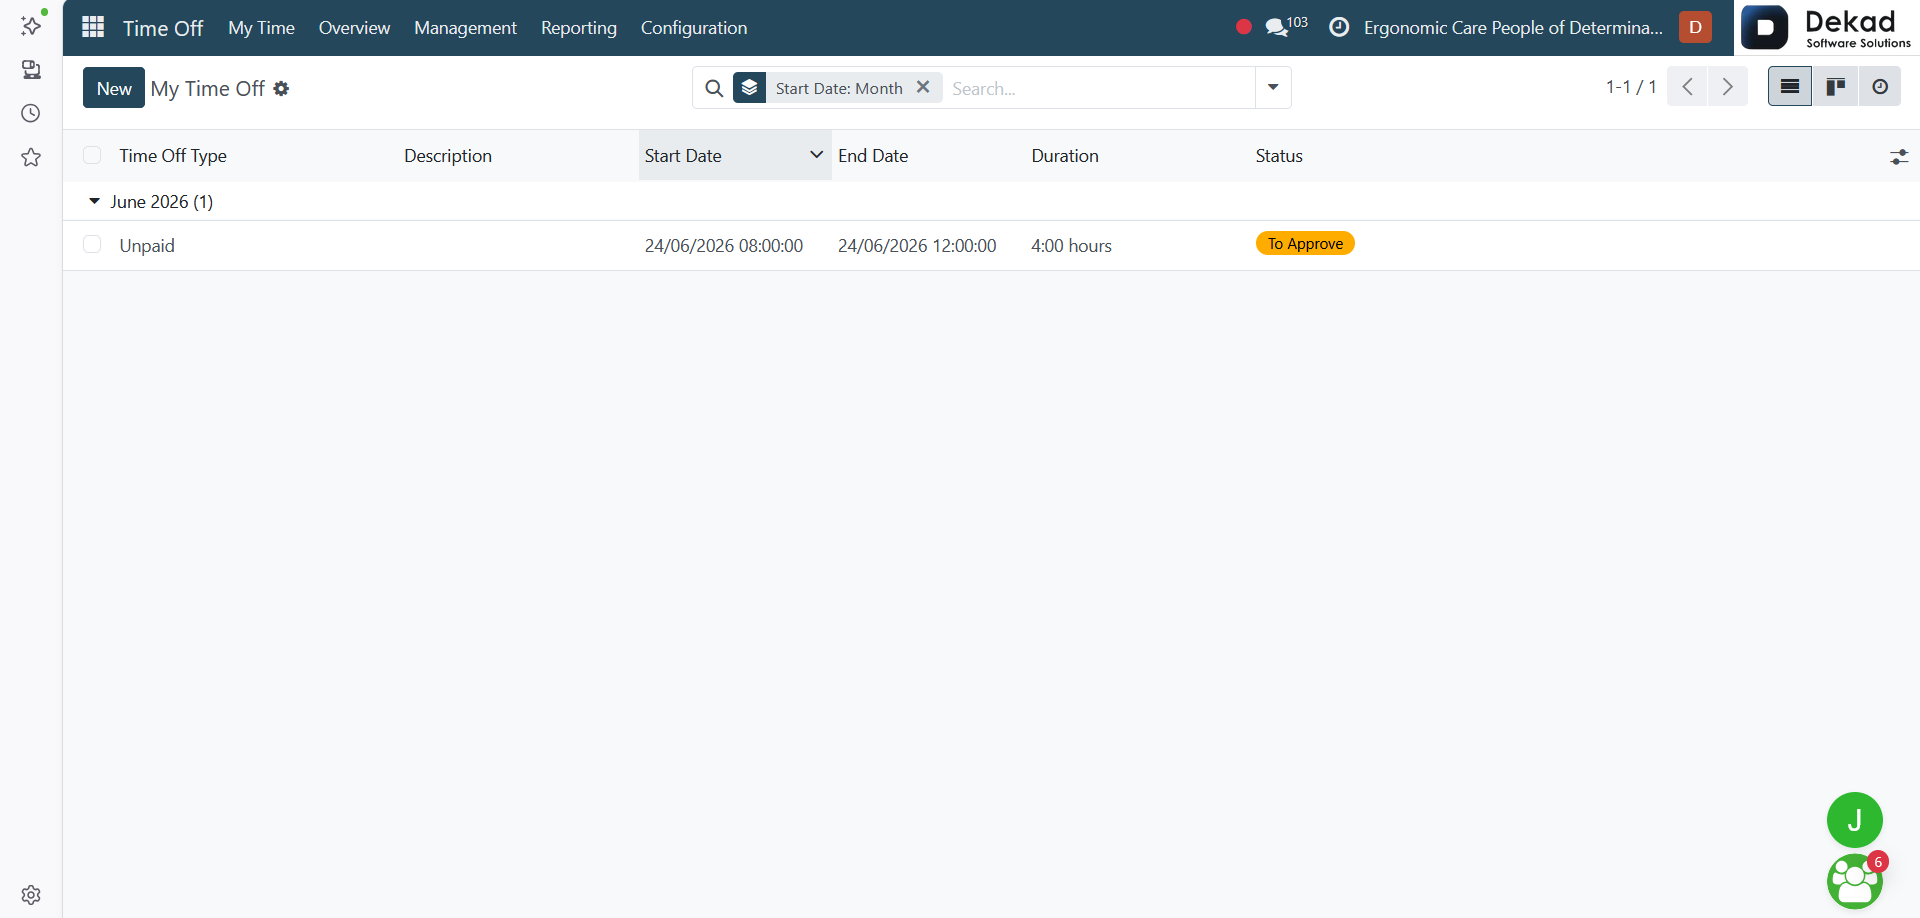
It provides a calendar-based overview where all
time off requests are displayed in a visual
format. Each request appears on the calendar
with a color indicator based on its status,
such as pending or approved.
When a user clicks on any marked date, a detailed
view of the request is shown, including information
such as the type of leave, duration, and current status.
This section helps users easily track their
submitted requests, monitor their approval
status, and view all past and upcoming time
off in a clear and organized way.
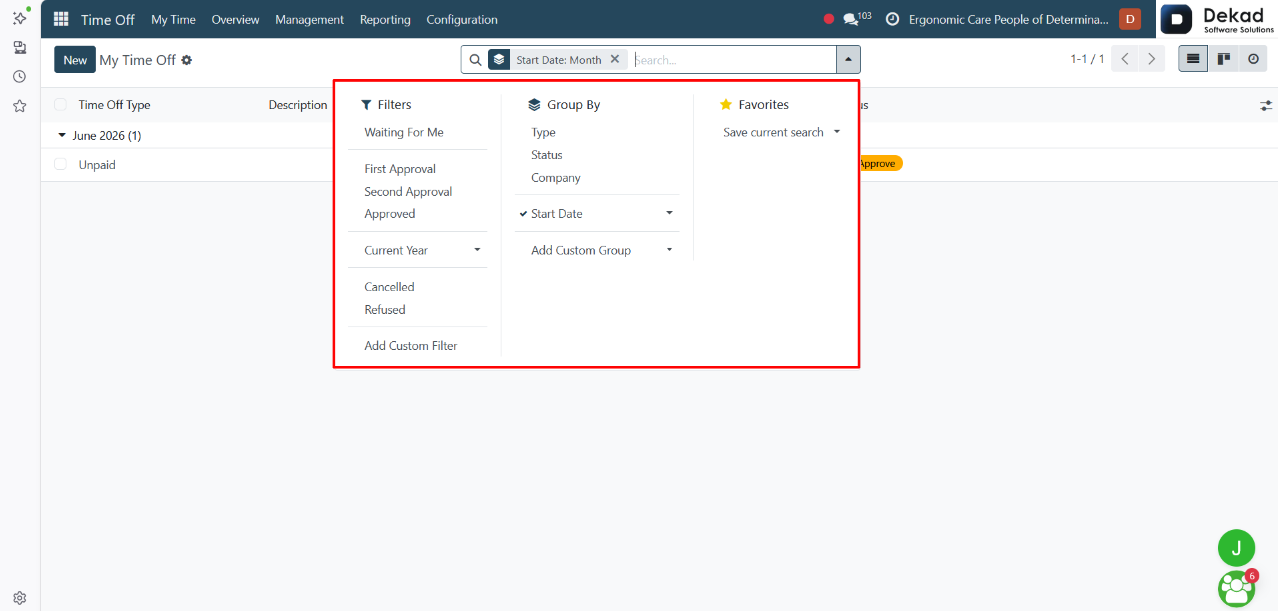
Search and Filtering
The search and filtering feature helps users
quickly find specific records by searching
keywords and applying filters to narrow
the results.
New Time Off Request
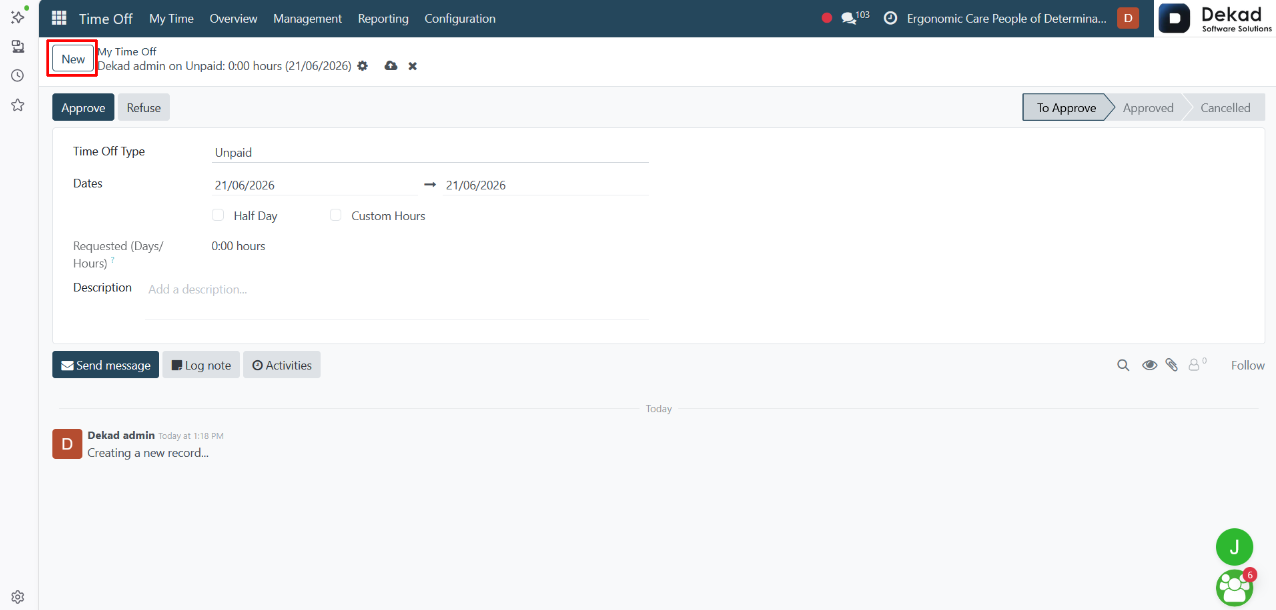
The New button is used to create a new time off request.
When the user clicks on it, a form opens
where all required information can be entered
in one place, such as the request details and duration.
After filling in the form and saving it, the request
is submitted and appears in the system with a
status To Approve, meaning it is waiting for
approval before being confirmed.
This allows users to easily submit new requests
while keeping them in a pending state until reviewed.
1.3 My Allocations
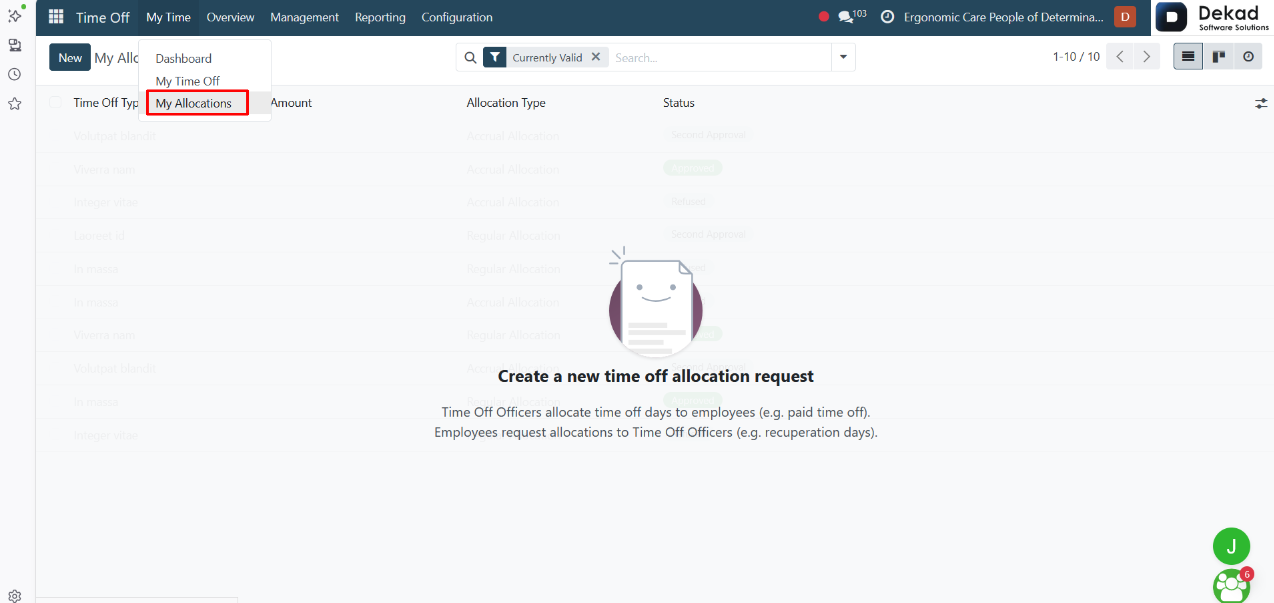
The My Allocations section shows the employee’s
available leave balance and allocated time off.
It allows users to view how many days or hours they
have been granted for different types of leave,
such as vacation or other time off categories.
This section helps employees keep track of their
remaining balance and understand how much
leave they can still use.
Search and Filtering
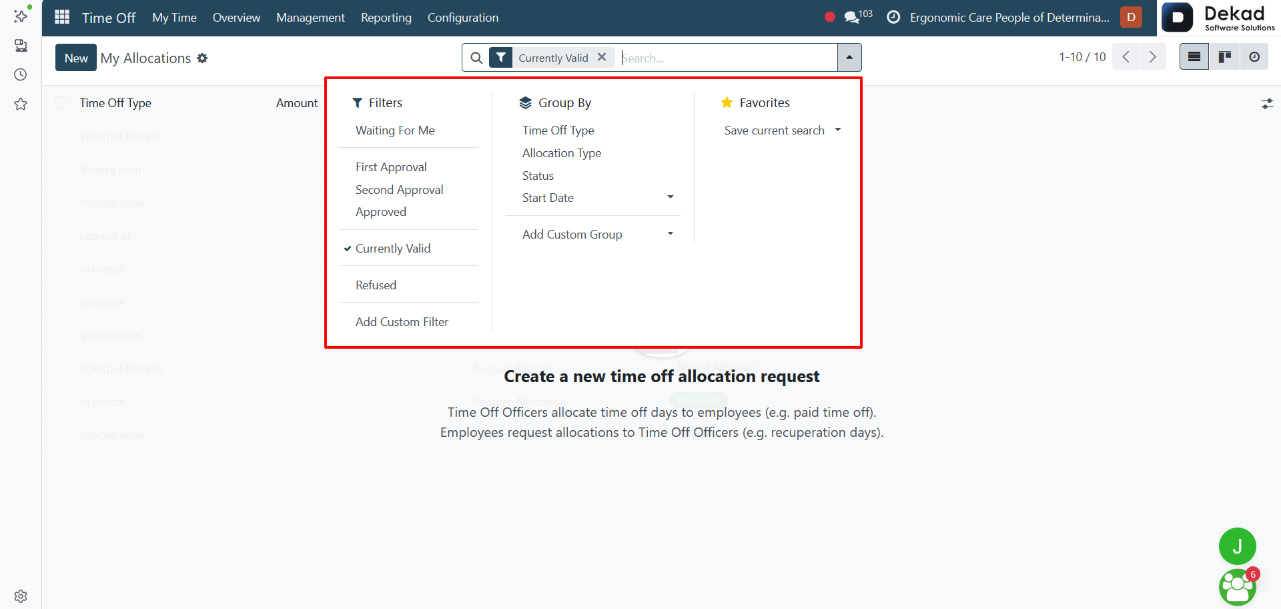
The search and filtering feature helps users
quickly find specific records by typing keywords
or applying filters to narrow down the results.
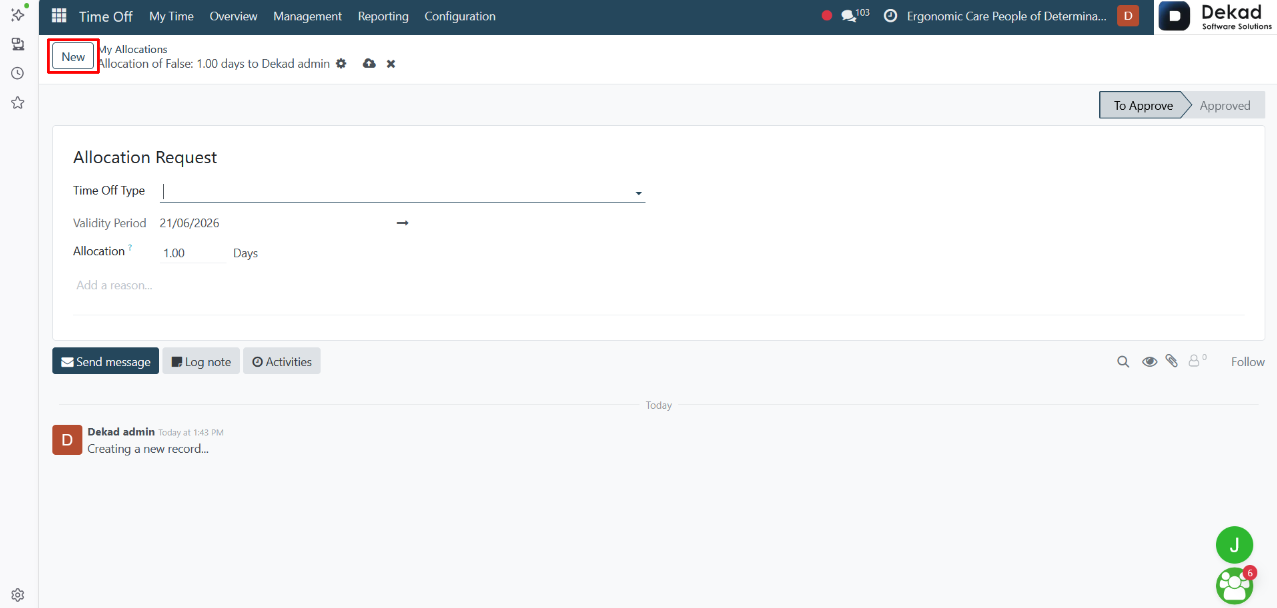
New Allocation Request
When creating a new allocation request,
a form is opened to request additional
leave balance for a specific time off type.
The form includes the main details needed to
define the allocation, such as the time off
type, validity period, and the amount of allocation.
Users enter the number of days they are requesting,
and the system assigns the request to the
selected period starting from the specified date.
After saving the request, it is submitted and
sent for approval before it becomes available for use.